Each Irinos box has two M4 threaded sleeves on the rear. These, together with optionally available adaptors, provide a range of mounting options.
Direct mounting via threaded sockets on the rear
Each Irinos box has two M4 threaded sockets on the rear. This allows for direct mounting.
Please note the following restrictions when securing the box:
oThe maximum screw-in depth is 7 mm. Select screws of a suitable length.
oThe maximum tightening torque is 2 Nm.
oDo not apply any lateral load to the threaded sleeves. Otherwise, they may come loose.
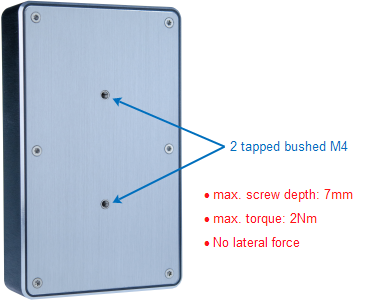
Mounting via rear side threaded sockets
Mounting on a DIN rail
➔The IR-MHRM-1 adapter is required for mounting on a DIN rail.
The IR-MHRM-1 DIN rail adapter is supplied pre-assembled (see illustration). It is secured to the rear of the Irinos Box using the 2 Allen screws supplied.
The Irinos Box can then be mounted on a TS35 DIN rail. To do this, hook the Irinos Box onto the top-hat rail from above. Then press down from above until the mounting mechanism clicks into place on the underside of the top-hat rail.
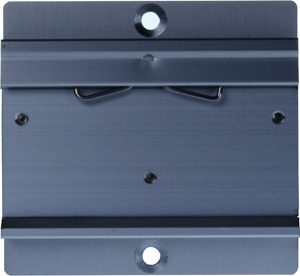
DIN rail adapter IR-MHRM-1
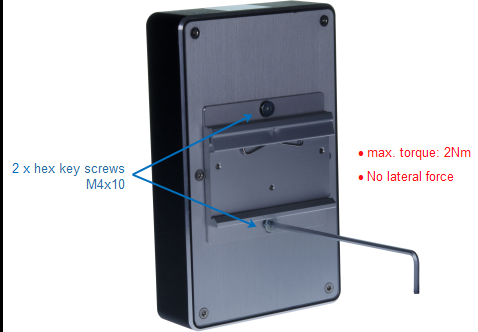
Fitting the IR-MHRM-1 DIN rail adapter
Front mounting via a mounting flange
➔Zur Front-Befestigung ist der Befestigungs-Flansch IR-MFFM-1 erforderlich.
The mounting flange is secured to the rear of the Irinos box using the two Allen screws supplied (see illustration).
The Irinos box can then be fitted from the front using the three ‘keyholes’, for example onto the wall of a control cabinet.
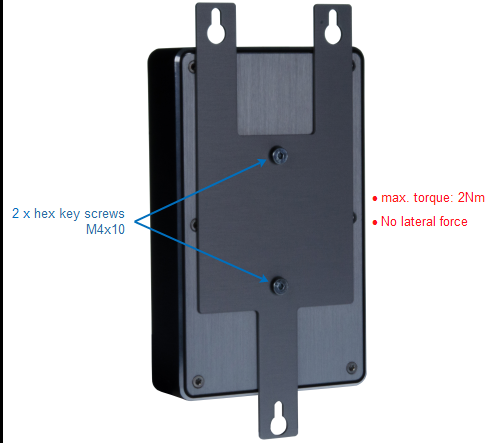
Fitting the IR-MFFM-1 mounting flange
Mounting on a 40 mm aluminium profile
➔The IR-MITEM-40 mounting bracket is required for attachment to the aluminium profile.
The mounting bracket is secured to the back of the Irinos Box using the 2 Allen screws supplied:
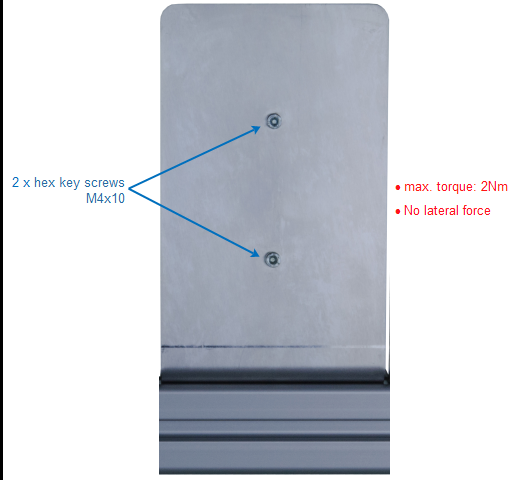
Fitting the Irinos box to the mounting bracket
The Irinos box can then be fitted to an aluminium profile from the front using the two ‘keyholes’. This requires suitable T-slot nuts and screws for the aluminium profile. These are not included with the mounting bracket.
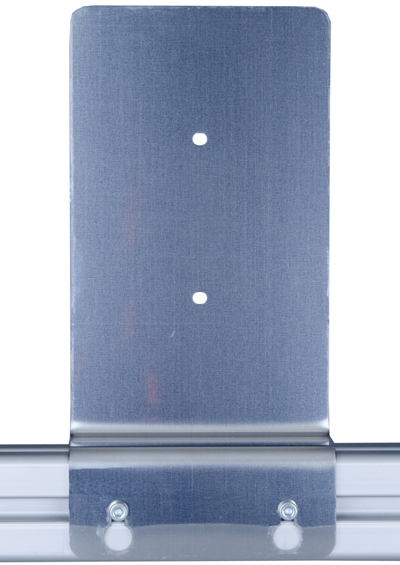
Fitting the mounting bracket to the aluminium profile